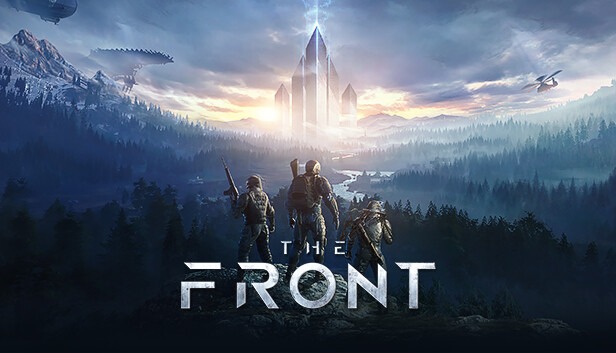
“The Front” is an exciting addition to the gaming world, offering players a unique experience in a post-apocalyptic open-world setting. Developed and published by Samar Studio, this survival open-world crafting shooter transports you to a world on the brink, where a tyrannical empire’s reign must be stopped.
In “The Front,” you step into the shoes of a resistance fighter with a daring mission – to travel back in time and prevent the rise of the oppressive empire. Your journey is a thrilling blend of survival and strategy. To accomplish your mission, you’ll need to collect vital resources, craft advanced technology, build shelters to protect yourself from the harsh elements and stand your ground against menacing monsters.
The game, set to be released on October 11, 2023, promises an immersive experience that challenges your survival instincts and tactical skills. With mixed reviews, it’s clear that “The Front” offers a unique gaming experience that has captured the attention of players. Are you ready to join the resistance and rewrite history?
Source: Official “The Front” Store Page
The Front is a survival open-world crafting shooter. You play the role of a resistance fighter sent back in time to stop the rise of a tyrannical empire. Collect resources, craft tech, build shelters, and fight monsters to accomplish your mission.
The game features a variety of gameplay elements, including:

- Survival: Players must manage their hunger, thirst, and fatigue in order to survive. They must also scavenge for resources and build shelter to protect themselves from the elements and enemies.
- Crafting: Players can craft a variety of items, including weapons, tools, and vehicles. Crafting allows players to customize their playstyle and create the items they need to survive and thrive.
- Building: Players can build bases and fortifications to protect themselves from enemies and the elements. Bases can be used to store resources, craft items, and research new technologies.
- Combat: The Front features a variety of weapons and enemies, as well as a variety of combat scenarios. Players must use their skills and resources to survive in combat and defeat their enemies.
The Front Game Setting
In the realm of gaming, every player desires an experience that caters to their preferences and needs. One of the ways to achieve this is by optimizing the in-game settings. Whether you’re an avid gamer or just starting your gaming journey, understanding how to tweak these settings is essential.
Accessing the Settings Menu
To tailor your gaming experience, begin by accessing the settings menu while in-game. It’s often as simple as pressing the designated key, often shown as “<Settings Key>,” on your keyboard. This action will unveil an array of options that allow you to fine-tune your experience.

What’s Inside the Settings Menu?
The settings menu is your gateway to a customized gaming adventure. It offers a variety of options, including:
- Graphics: This option allows you to adjust graphics quality and user interface elements. Enhance your visual experience by finding the perfect balance between performance and aesthetics.
- Controls: Customize character and vehicle controls to suit your playstyle. Achieve precision and responsiveness to make your gaming more enjoyable.
- Sound: Tailor sound settings to immerse yourself in the game world. Adjust volume levels, sound effects, and more to suit your audio preferences.
- Language: If you prefer to play the game in your native language or explore it in a new one, this option allows you to change the language of the game’s interfaces.
- Streaming Mode: For those who want to share their gaming adventures with the world, enabling streaming mode can help optimize your settings for a smoother streaming experience.

In addition to these, the settings menu may also include options like “Suicide,” “Feedback,” “Back to Game,” “Back to Menu,” and “Exit Game,” which allow you to navigate your gaming experience efficiently.
The Game’s Interface: Mastering Survival
In the world of video games, understanding your environment and your character’s status is crucial for survival. The game’s interface acts as your trusty guide, revealing the secrets of the digital realm. This portion of The Front Wiki will take you on a journey through the main interface components, helping you decode the virtual world with ease.
The Front Main Interface: A 7-Part Symphony
The game’s main interface is a symphony of seven essential components. Each part plays a crucial role in your virtual survival:

| 1. Compass: Your Directional Guide The compass is your digital north star. It shows the direction you’re facing, ensuring you never lose your way in the game’s vast landscape. 2. Environment: The Heartbeat of Nature The environment panel is like a digital weather station. It provides information about temperature, humidity, wind speed, rainfall, illumination intensity, in-game time, and the current weather. Temperature: It impacts plant growth, water consumption, fertilizer use, and your character’s health. Extreme temperatures trigger status effects, affecting hydration and fullness. Humidity: Affects Dew Collectors’ water collection rate. Wind Speed: Influences power generation by Wind Generators. Rainfall: Affects Dew Collectors and Crop Plots’ water collection and hydration. Illumination Intensity: Impacts power generation by Solar Generators and plant health. In-Game Time: Time passes differently in the game, making this crucial for planning. Weather: With various weather conditions, from sunny to foggy, it adds an element of unpredictability. 3. Task Tracker: Your To-Do List This tracker keeps you on top of your tasks. Hit the “L” key for detailed task information. 4. Character Status: Your Health Bar This vital panel displays your character’s health, hydration, fullness, and body temperature. Be wary of adverse effects that can harm you. HP: When it hits zero, your character becomes wounded, and without healing, they may die. Hydration: Reaching zero leads to gradual HP loss. Fullness: The same as hydration, it can lead to HP reduction when depleted. Body Temperature: This scale ranges from Freezing to Overheated, impacted by gear and the environment. 5. Stamina Bar: Your Energy Reservoir Stamina powers actions like jumping and sprinting. When it’s empty, you’re out of luck for these movements. 6. Shortcut Bar: Easy Access to Essentials This bar holds your tools, weapons, structures, and food. Simply drag items from your inventory to equip them. It’s your digital utility belt. 7. Character Level and XP: Leveling Up Matters Keep track of your character’s level and the XP required for the next level. The game caps your progress at Level 60. |
The Front Inventory Menu: A Five-Part Arsenal
Beyond the main interface, the inventory menu holds the tools of your trade. It consists of five key parts:

| 1. Character Interface: Know Your Character Here, you’ll find basic character information, including name, level, attributes, and gear slots. 2. Inventory Interface: Your Digital Backpack Items you acquire are stored here, but beware of inventory limits. Use storage containers to save space. 3. Shortcut Bar: Quick Access to Essentials These tools, weapons, structures, and food items are always at your fingertips. 4. Status Effects: A Deeper Dive Discover the various status effects your character can experience due to environmental factors and enemy attacks. 5. Function Menus: Navigational Tools These menus – Inventory, Crafting, Tech, Talents, Tasks, Squad, Map, Mail, and Help – provide essential functionalities. |
The Front Attributes: The Building Blocks of Survival
Your character’s attributes are critical to your success. These are the key attributes you need to know:

| HP: Your Lifeline Your character’s health, represented by HP, increases as you level up. Some talents and food can provide additional bonuses. HP Recovery Rate (s): Healing Speed This attribute, your HP recovery rate, also increases as you level up, and certain talents and food provide additional bonuses. Stamina: Fuel for Action As your character levels up, stamina increases, and you can gain additional bonuses from talents and food. Stamina Recovery Rate (s): Recharging Faster This attribute improves as your character levels up, and it can be boosted by talents and food. Fullness: Managing Your Hunger Fullness increases with leveling up but depletes more quickly in cold environments and during HP and Stamina recovery. Hydration: Stay Quenched Hydration increases with character level and can receive bonuses from talents and food. It decreases faster in hot environments. Speed (m/s): On the Move Your current walking speed is displayed here, with sprinting making you move 1.8 times faster. Certain gear and food can increase your speed. Jump: Reach New Heights This attribute affects your character’s jump height and speed. Some talents can enhance this ability. Cold RES: Cold Resistance This shows your resistance to cold environments, impacting your body temperature. Gear, talents, food, and gear modules can influence it. Heat RES: Heat Resistance Like Cold RES, this attribute represents your resistance to hot environments and is influenced by gear, talents, food, and gear modules. EXP: Experience Points This measures the XP you’ve acquired at your current level. Strike DMG RES: Physical Resistance Your resistance to physical damage from punches and melee weapons is displayed. Gear, talents, food, and modules can increase this resistance. Bullet DMG RES: Bullet Resistance Your resistance to bullet damage is crucial. Gear, talents, food, and modules can all enhance this resistance. |
In the complex world of the game, understanding the interface and mastering your character’s attributes is key to survival. Equip yourself with this knowledge, and you’ll thrive in even the most challenging digital landscapes.
The Front Basic Control
Certainly! The basic controls for a game, particularly one involving both ground and airborne vehicles, can significantly impact your gameplay. Here’s a breakdown of the controls for character movement, as well as how to handle both ground and airborne vehicles:
The Front Character Movement Controls:
| Directional Keys (W, A, S, D): Used for moving your character. W moves forward, A to the left, S backward, and D to the right. Shift: When combined with W, it enables sprinting or various actions based on the context, such as scoping or holding your breath while aiming with a firearm. Space: For jumping. Ctrl: Allows your character to crouch. 1-8: Use items from the shortcut bar. R: Used for reloading weapons or rotating/repairing structures. E: In the context of piloting a vehicle, it starts or stops the engine. F: Used for collecting items or drinking when facing water. Y: In a vehicle, toggle the headlamps. C: Involves using or equipping items, canceling a bow pull, or firing jammers when piloting an air vehicle with jammers equipped. X: Toggles structure replacement mode when placing a structure. Z: Commands followers. H: When piloting an air vehicle, activate hovering. B: Opens the inventory. Tab: Accesses the crafting interface. O: Opens the tech interface. T: Provides access to talents. L: Lists tasks. G: Manages the squad interface. M: Opens the map. K: Inspects weapons when they are equipped. =: Enables auto-walk. F11: Switches window mode. Alt: Used for switching ammo types when a weapon is equipped, often in combination with the middle mouse button. Enter: Opens and closes the chat window. Left-click: Used for attacking, firing, throwing items, or making selections. Right-click: With a gun equipped, it is used for aiming, quickly transferring items, switching structure types when placing structures, and zooming while piloting a vehicle. U: Accesses mail. |
The Front Ground Vehicle Controls:
| Ground vehicles are available starting at Level 16 and can be crafted at the Vehicle Factory: Placing Vehicles: When your Vehicle Factory has completed crafting a vehicle, click and drag it to your shortcut bar. Position your character, and then press the corresponding shortcut key to deploy the vehicle. Operating Vehicles: Approach the vehicle, press and hold the specified key to access the interaction menu, and select “Get in Pilot” to start piloting the vehicle. Starting Vehicles: Vehicles need gasoline to start. Open your inventory in the pilot’s seat, drag gasoline from your inventory to the vehicle’s gas can, and then press the corresponding key to start it. Vehicle Movement: Controlling ground vehicles is similar to character movement, using the directional keys and mouse to control the camera. Attacking: Different types of vehicles have specific capabilities. For example, tanks can only attack when started, and you need to load shells into the “Vehicle Ammo Rack” to fire. Aiming is done with the help of crosshairs, and you can press a key to aim accurately before firing. |
The Front Airborne Vehicle Controls:
| Airborne vehicles are also available starting at Level 16 and can be crafted at the Vehicle Factory: Placing Vehicles: Similar to ground vehicles, you can place airborne vehicles by dragging them to your shortcut bar and deploying them. Operating Vehicles: Get into an airborne vehicle by interacting with it, selecting “Get in Pilot” or “Get in Gunner” based on the vehicle type. Starting Vehicles: Just like ground vehicles, airborne vehicles require gasoline to start. You can load gasoline into the vehicle to make it operational. Vehicle Movement: Airborne vehicles have more complex controls, including takeoff, flying forward and backward, hovering, ascending and descending, turning, and landing. Attacking: Airborne vehicles, like helicopters, have various weapons such as machine guns and missiles. You need to load ammunition and use the correct weapon for the target. Warnings and Evasion: If you are targeted by an enemy, you will receive a warning indicator. To avoid incoming projectiles, you should maneuver the vehicle or use countermeasures if available. These controls are crucial for mastering the game and successfully navigating both the ground and airborne vehicles. It’s essential to practice and become familiar with these controls for a competitive advantage. |
The Front Spacetime Beacon

| The Spacetime Beacon is a valuable tool used in base-building within the game. Here are its key functions: Spatial Positioning Device: The Spacetime Beacon serves as a spatial positioning device, aiding in the construction of your base. Supply Signals: It can send signals to receive supplies, making it useful for maintaining your base’s resources. Territory Marking: The beacon marks your territory over a radius of 125 meters. This feature helps define and protect your base area. Automatic Repair: When stocked with repair materials, the Spacetime Beacon will automatically repair all structures within 50 meters. This automation is a significant convenience for maintaining your base’s integrity. Protection Time Setting (PVP Servers): On PVP (Player vs. Player) servers, you can configure the protection time for your base structures using the Spacetime Beacon. This setting prevents your structures from being attacked for a specified period, enhancing the security of your base. Unlocking: You can unlock the Spacetime Beacon from the Structures tab of the Tech interface, making it accessible for your base-building needs. The Spacetime Beacon’s multi-functional features make it an essential tool for managing and protecting your base in the game. Sources: gameplay.tips – The Front – Spacetime Beacons Steam Community – Build Spacetime Beacon and set protection time |
The Front Resource & Gathering
In “The Front,” collecting resources is a fundamental aspect of the gameplay. Here’s how you can efficiently gather resources to advance in the game:

Basic Resource Collection: When starting with a new character, your Tech level is low, and you won’t have many resources. Begin by collecting resources with your bare hands. This method is relatively primitive and allows you to collect basic resources like small stones, branches, and plants found on the ground, including bushes, dandelions, poppies, mushrooms, and fruit.

Tools for Efficiency: As you accumulate resources and level up, you can unlock new tools from the Weapons tab of the Tech interface. Tools significantly improve efficiency and allow you to collect specific resources. For example, the Stone Axe and Stone Pickaxe are basic collection tools. Craft them in your crafting inventory and equip them from your normal inventory. Different tools are used to collect various types of resources: Stone Axes for trees, Stone Pickaxes for ore, Stone Knives for animal carcasses, Stone Shovels for Crude Oil and Sand, and Stone Sickles for plants.

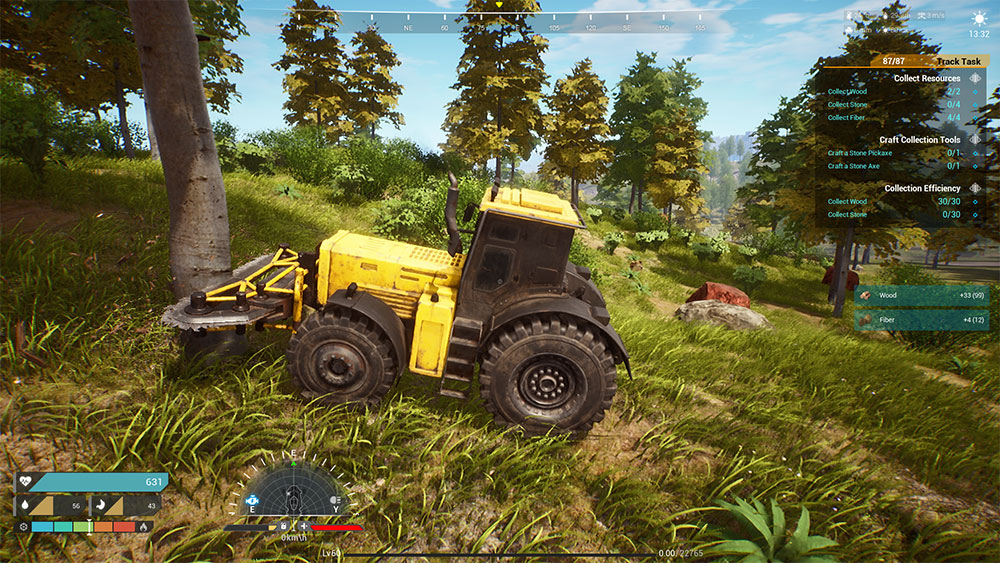
Resource Collection Vehicles: As your character progresses to a certain level, you can unlock resource collection vehicles from the Vehicles tab of the Tech interface. These vehicles, including Logging Trucks, Harvesters, and Miners, are highly efficient at collecting specific resources. Logging Trucks collect wood, Harvesters gather basic types of plants, and Miners extract ore. Drive these vehicles to resource locations to streamline your collection efforts.
Advanced Resource Processing: Basic resources you collect can be processed into advanced materials at workbenches, such as the Crafting Table, Chemist’s Bench, Forging Table, and more. These advanced materials are used for crafting structures, equipment, vehicles, defenses, and weapons.
Team Up for Efficiency: You can enhance resource collection efficiency by joining a squad from the squad interface. Within your squad, set up a division of labor with your squadmates, allowing you to collect resources more efficiently as a team.
| Efficient resource gathering is vital for progressing in “The Front” and expanding your base while crafting advanced structures and equipment. Sources: Based on in-game mechanics and principles. The information provided is generic to resource collection in the game. |
The Front Repairing System
In “The Front,” the Durability stat is crucial for most items, including tools, weapons, gear, vehicles, and structures. When an item’s Durability reaches zero, it becomes damaged and requires repair. Here’s how to handle Durability for various item categories:
Tool Repairing
Collection tools like Stone Axes, Stone Pickaxes, Stone Knives, and Stone Shovels in The Front lose Durability with use, and when their Durability reaches 0, they become unusable and need repair. Here’s how to check and repair these tools:

Checking a Tool’s Durability:
- When the tool is in your inventory, press the designated key to open your inventory.
- Move your mouse cursor over the tool to view its Durability.

How to Repair a Tool:
- Open your inventory by pressing the relevant key.
- Click on the tool you want to repair.
- Press the designated key to initiate the repair process.
- Wait for the repair to be completed.
This allows you to maintain your tools in good working condition, ensuring you can continue using them effectively in the game.
Weapon Repairing
In The Front, weapons like Flintlock Pistols, Double-Barreled Shotguns, Semi-Automatic Pistols, SMGs, and more have Durability that decreases with use. When a weapon’s Durability reaches 0, it becomes unusable and needs repair. Here’s how to check and repair weapons:
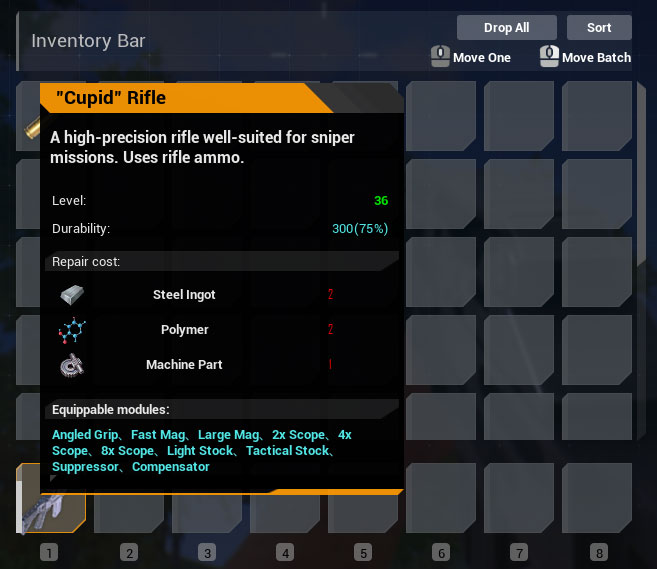
Checking a Weapon’s Durability:
- When the weapon is in your inventory, press the designated key to open your inventory.
- Move your mouse cursor over the weapon to view its Durability.
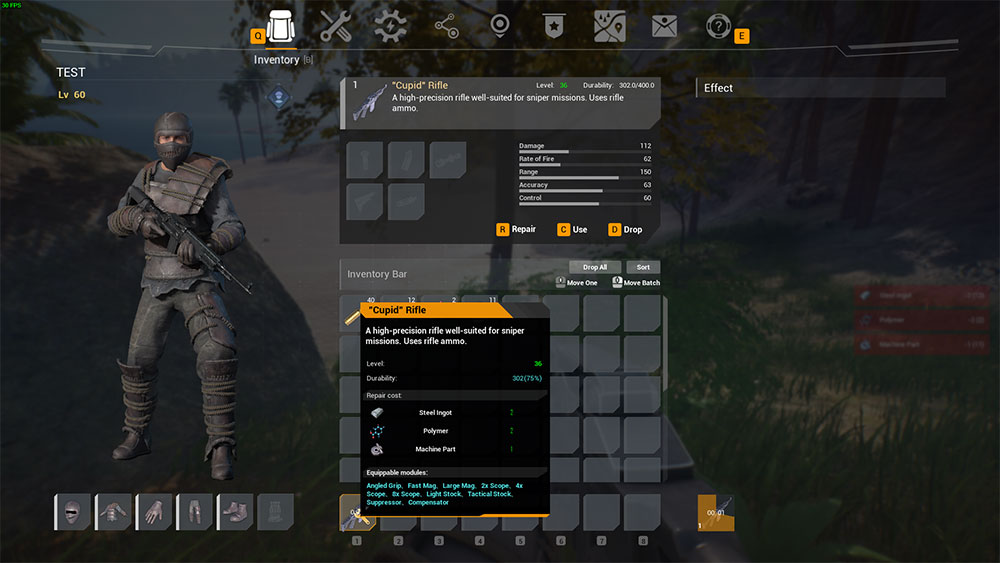
How to Repair a Weapon:
- Open your inventory by pressing the relevant key.
- Click on the weapon you want to repair.
- Press the designated key to initiate the repair process.
- Wait for the weapon to finish being repaired.
This ensures that your weapons remain in working condition, allowing you to effectively defend yourself and survive in the game.
Gear Repairing
In The Front, gear items only lose Durability when you are attacked while wearing them. If the Durability of your gear reaches 0, it will cease to provide defensive bonuses, and you’ll need to repair it or create a new one. Here’s how to check and repair gear:

Checking Gear Durability:
- When the gear item is in your inventory, press the specified key to open your inventory.
- Hover your mouse cursor over the gear to display its Durability.
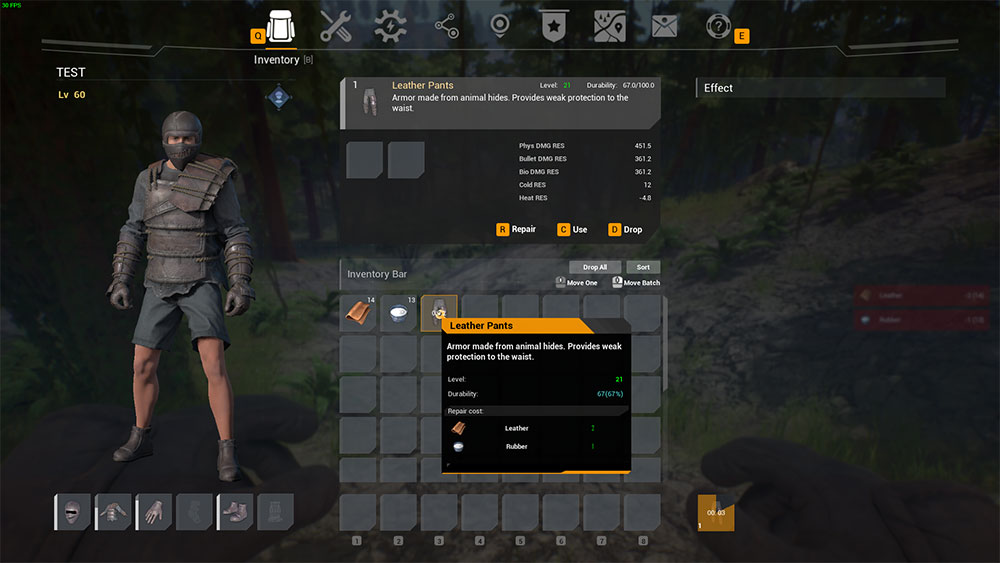
How to Repair Gear:
- Open your inventory by pressing the designated key.
- Transfer the equipped gear item from your character to your inventory.
- Click on the gear item you wish to repair.
- Press the relevant key to commence the repair process.
- Wait for the repair to be completed.
By following these steps, you can ensure your gear remains effective in providing you with defense and protection against threats in the game.
Vehicle Repairing
In The Front, a vehicle’s Durability is essentially its health points (HP). Vehicles lose Durability over time and when they come under attack. If a vehicle’s Durability drops to 0, the vehicle becomes irreparably destroyed. Therefore, it’s crucial to repair a vehicle before its Durability is completely exhausted. Vehicle repair can be done at Vehicle Factories following these steps:

Checking a Vehicle’s Durability:
- Use the specified keys to approach the vehicle.
- While facing the vehicle, press the designated key to view its current Durability.
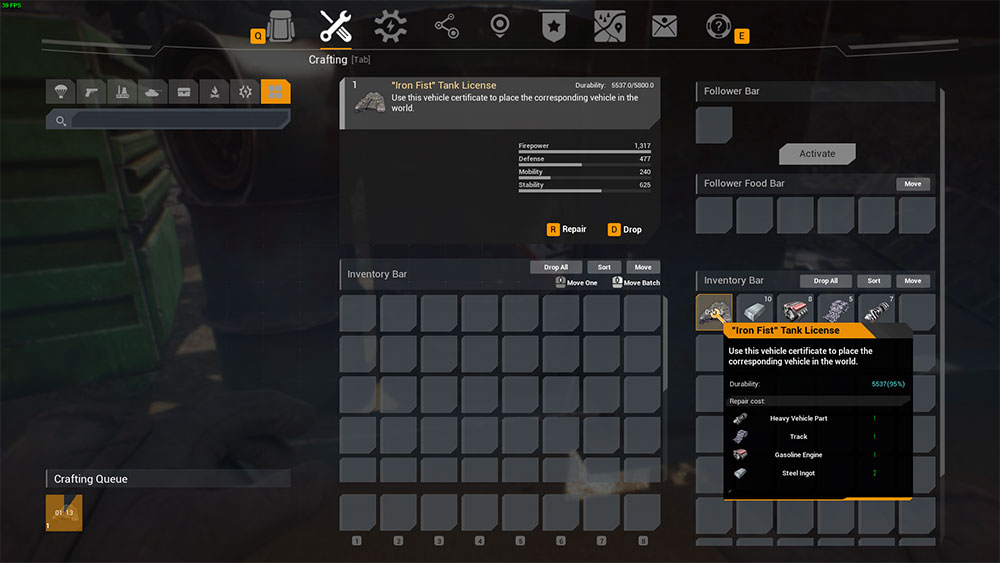
How to Repair Vehicles:
- Stand in front of the vehicle, and press and hold the assigned key to open the interaction menu.
- Select the “Reclaim Vehicle” option and wait for the vehicle to be reclaimed.
- Use the designated keys to approach a Vehicle Factory and press the specified key to interact with it.
- Move your mouse cursor to your inventory, then click on the vehicle you wish to repair to transfer it to the Vehicle Factory’s inventory.
- Hover the mouse cursor over the vehicle in the Vehicle Factory and click the assigned key to select it.
- Press the relevant key to commence the repair process and wait for the vehicle to finish being repaired.
Following these steps will allow you to maintain and repair vehicles, ensuring their continued functionality in the game.
Structure Repairing
In The Front, structures are essential for your base’s functionality and defense. These structures will gradually lose Durability over time and can be damaged when attacked. When a structure’s Durability reaches 0, it will be destroyed, and this can cause a cascading effect where other connected structures also collapse. To maintain your structures, you have two repair options:
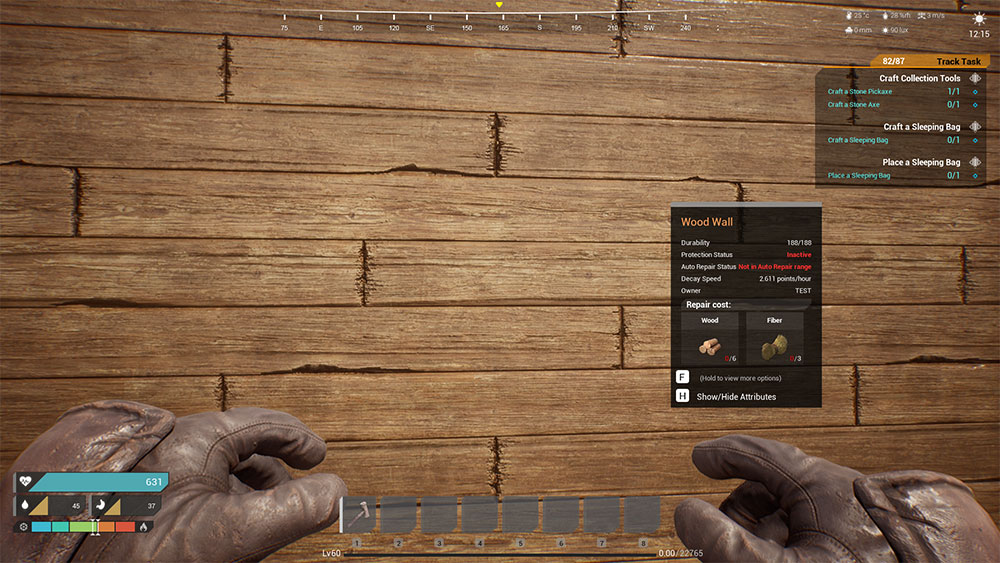
Checking a Structure’s Durability:
- Use the designated keys to approach the structure.
- While facing the structure, press the specified key to view its current Durability.

How to Repair Structures Using a Wood Hammer:
- Open the Tech interface and unlock the Wood Hammer in the Weapons tab.
- Access your Crafting inventory to craft a Wood Hammer.
- Add the Wood Hammer to your shortcut bar and equip it by pressing the corresponding shortcut key.
- Approach the structure in need of repair and use the equipped Wood Hammer to repair it.
Note: Some structures with very low Durability or those recently attacked may not be repairable.
How to Repair Structures Using a Spacetime Beacon:
- Open the Tech interface and unlock the Spacetime Beacon in the Structures tab.
- Craft a Spacetime Beacon in your Crafting inventory.
- Add the Spacetime Beacon to your shortcut bar and place it by pressing the corresponding shortcut key.
- Open the Spacetime Beacon’s interface.
- In the upper-right corner, you’ll see the required resources for maintaining nearby structures.
- Transfer the necessary resources from your inventory to the Spacetime Beacon’s inventory.
- Click “Submit Resources.”
Note: The Spacetime Beacon’s auto-repair function is applicable only to structures and not vehicles. It will automatically repair 10% Durability for all structures within its range every hour, provided it has enough resources.
These repair methods are crucial for maintaining your base’s integrity and functionality in The Front.
Building Structure in The Front
In the context of The Front, structures play a pivotal role as essential facilities for both resource storage and shelter, enabling survival in a challenging environment. The selection of an appropriate construction site is a critical decision, in determining the overall efficacy of your base. This involves considerations of site characteristics, construction methods, layout design, structural support, and aesthetic enhancements.
Structures within The Front exhibit a diverse range of materials, including wood, concrete, stone, steel, and metal alloys. The material quality directly impacts the Durability and defensive capabilities of your structures. Opting for higher-quality materials enhances your ability to withstand threats posed by formidable wildlife and hostile forces within the game.
Foundations
In The Front, essential structure components encompass foundations, tri-foundations, and pillars. These components can be accessed from the Structures tab within the Tech interface. Notably, tri-foundations and pillars are not individually unlocked but are integral parts of the foundation structure. You can switch between these different types of foundation structures during placement.
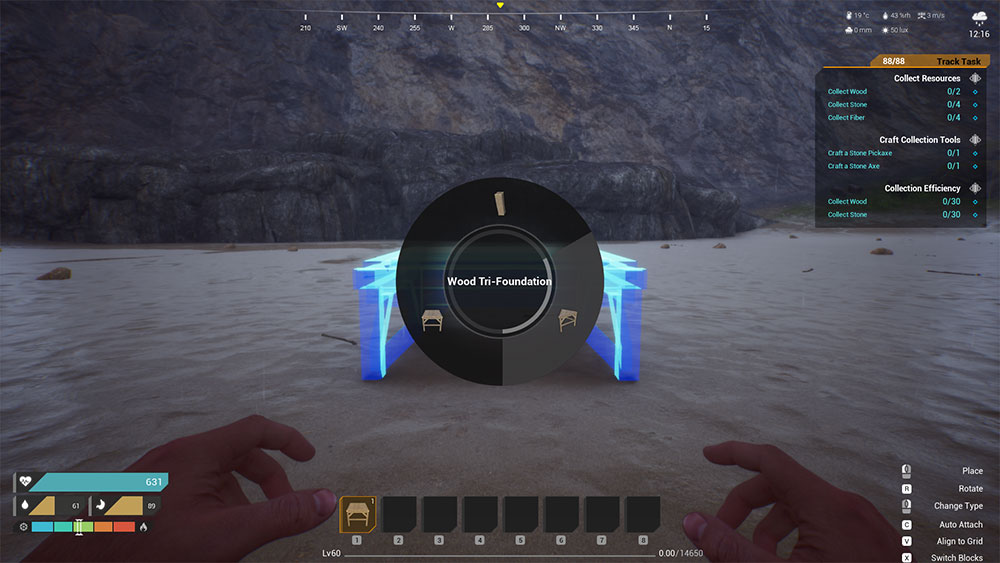
Here’s how to switch between foundation structures:
| Equip the Foundation: Craft a foundation, add it to your shortcut bar, and then press the corresponding shortcut key to equip it for placement. Access Structure Switching Menu: Click the designated key (e.g., ” “) to open the structure-switching menu. Click and hold the mouse button, then drag the cursor to the desired structure type you want to switch to. Release the mouse button to confirm the switch. Placement and Orientation: After selecting the structure type, click again to confirm the location where you wish to place the structure piece. Adjust its orientation by sliding the mouse left and right. Final Placement: Click once more to firmly place the structure in your desired location. |
This process allows you to seamlessly transition between foundation structures, providing flexibility and customization in your construction efforts.
Support Structure
To create support structures in the game, such as walls, half walls, open walls, door frames, window frames, vertex walls, tri-walls, and railings, you’ll need to follow these steps:
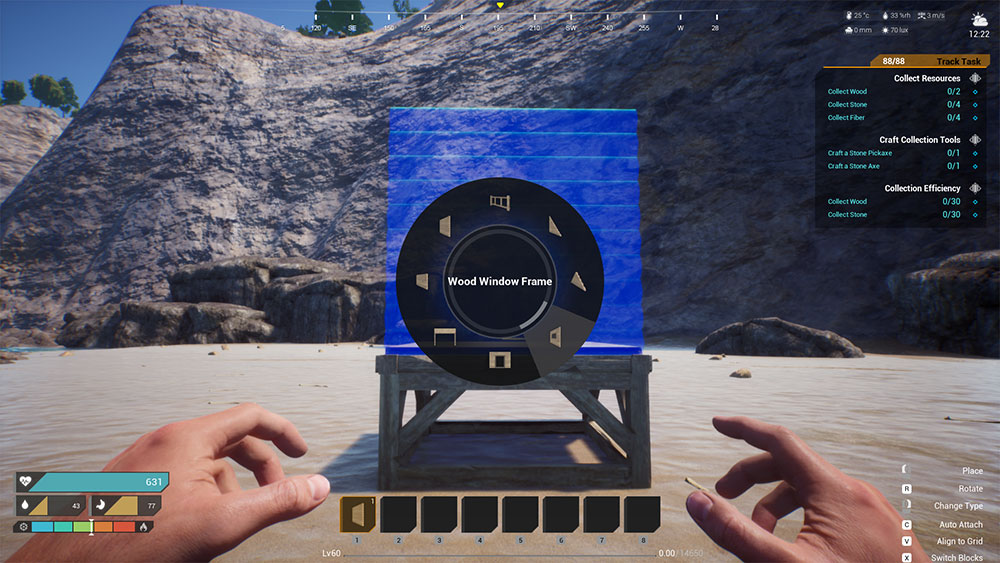
These steps allow you to customize and place various support structures according to your in-game needs, offering flexibility in your construction endeavors.
| Unlocking Structures: These support structures can be unlocked from the Structures tab found in the Tech interface. While half walls, open walls, door frames, window frames, vertex walls, tri-walls, and railings are not unlocked individually, they are accessible as part of the wall structure. Selecting the Structure Type: To switch between the different types of wall structures, you need to craft the wall component. Once crafted, drag it to your shortcut bar for easy access and press the corresponding shortcut key to equip it. Structure Switching Menu: When you’re ready to place the structure, click the designated key (e.g., ” “) to open the structure-switching menu. Click and hold the mouse button and then drag the mouse to select the desired structure type from the available options. Placing the Structure: After selecting the structure type, click once more to confirm the location at which you want to place the structure piece. You can adjust its orientation by sliding the mouse left and right. Final Placement: Confirm the placement by clicking once more, which will securely position the selected structure in your chosen location. |
Roof & Ceilings
In the game, constructing roof and ceiling-type structures involves a range of elements, including roofs, ridges, ridge tops, ridge corners, and ridge concave corners. Here’s how to work with these structures:

| Unlocking Roof and Ceiling-Type Structures: Access the Structures tab in the Tech interface to unlock these structures. Notably, ridges, ridge tops, ridge corners, and ridge concave corners are not individually unlocked but are part of the roof structure. Switching Between Roof Structure Types: To switch between different types of roof structures, first craft a roof component. Drag the crafted roof to your shortcut bar and press the corresponding shortcut key to equip it. When you’re ready to place the roof structure, press the designated key (e.g., ” “) to bring up the structure-switching menu. Click and hold the mouse button, then drag the mouse to select the desired structure type from the available options. Confirm the location where you want to place the chosen structure piece by clicking. Finally, click once more to firmly place the structure in your preferred location. |
This process allows you to customize and place various roof and ceiling-type structures, providing flexibility in your in-game construction endeavors.
Doors & Windows
In the game, various door-type structures are at your disposal, including single doors, double doors, windows, barriers, and gates. To work with these structures, follow these steps:

| Unlocking Door-Type Structures: Access the Structures tab in the Tech interface to unlock these door-type structures. Placement of Doors and Windows: Doors and windows can only be placed within designated door frames and window frames. These frames are integral parts of the wall structure and can be switched to when placing a wall. |
This system ensures that doors and windows fit seamlessly into your constructed walls. By unlocking the necessary structures and incorporating door frames and window frames into your wall design, you can customize your in-game structures effectively.
Stairs & Ladders
In the game, you have access to various climbing structures, which include stairs, ladders, winder staircases, and stair landings. To use these structures effectively, follow these steps:

| Unlocking Climbing Structures: Access the Structures tab in the Tech interface to unlock these climbing structures. Switching Between Different Types of Climbing Structures: Craft stairs, drag them to your shortcut bar, and then press the corresponding shortcut key to equip them. Click the designated key (e.g., 1) to bring up the structure-switching menu. Click and hold the mouse button and drag to select the desired structure type (e.g., stairs, ladders, winder staircases, or stair landings) from the menu. Release the mouse button to switch to the chosen structure type. Placement of Climbing Structures: Click to confirm the location at which you want to place the selected climbing structure. Click one more time to finalize the placement of the structure. |
By following these steps, you can efficiently unlock, switch between, and place the various climbing structures in the game to suit your needs.
Furniture
In The Front, various furniture structures are available, including sleeping bags, beds, storage chests, tables, and chairs. To access and use these structures:
| Unlocking Furniture Structures: Go to the Structures tab of the Tech interface to unlock these furniture structures. Role of Sleeping Bags and Beds: Sleeping bags and beds serve as crucial items in The Front. Once you’ve placed a sleeping bag or bed in the game world, you can use them as respawn points. In the event of your character’s death, respawning at a sleeping bag or bed significantly reduces the risk of spawning in a random and potentially dangerous location. Storage Chests for Supply Management: Storage chests are essential for managing your supplies and equipment. These chests provide ample storage space, allowing you to neatly organize and store various items you collect in your adventures. |
By utilizing these furniture structures, you can enhance your in-game experience, ensuring a reliable respawn point and efficient supply management.
Lighting
Lighting equipment in The Front offers various options for illumination, including bonfires, wall torches, flashlights, fluorescent lights, and fixed searchlights. Here’s how to use them:
| Bonfires: Open your crafting inventory by pressing the designated key (e.g., TAB). Locate the bonfire icon on the left side of the crafting inventory and click on it to craft a bonfire. Drag the crafted bonfire from your inventory to your shortcut bar. Press the corresponding shortcut key to equip the bonfire from your shortcut bar. Click to place the bonfire in your desired location. Face the bonfire and press to open its interaction interface. Click the “Start” button beneath the bonfire’s consumable bar to light it. Flashlights: Craft a flashlight from available materials. Drag the flashlight to your shortcut bar. Press the corresponding shortcut key to equip the flashlight from your shortcut bar. Click to turn on the flashlight and click again to turn it off. |
Utilizing these lighting options is essential for providing visibility in the game, whether through the warm glow of bonfires or the portability of flashlights.
Electrical Appliance
Electrical appliances such as heaters, refrigerators, air conditioners, and more are vital for modern living. To use these appliances effectively, here’s what you need to know:
| Unlocking Electrical Appliances: Access the Technology tab within the Tech interface. Here, you can unlock various electrical appliances based on your tech progression and available resources. Connecting to an Electrical System: Ensure you have a functional electrical system in your base. This typically involves power generation sources like generators or solar panels. Use electrical wiring to connect your appliances to the electrical system. This includes running wires from your power source to the appliances. Most appliances will have specific connectors or power input points where you can attach the electrical wires. |
By following these steps, you can successfully unlock and use electrical appliances to enhance your in-game experience in The Front.
The FRONT Defense System
In the realm of “The Front,” an array of potential dangers looms. These include aggressive wildlife, armed non-playable characters (NPCs), marauding zombies, and the ever-present risk of hostile actions from fellow players. To safeguard your well-being and fortifications, it is paramount to strategically implement robust defensive measures. By constructing and deploying formidable defensive structures, you can effectively mitigate the risks posed by these threats, ultimately minimizing losses and securing the integrity of your base.
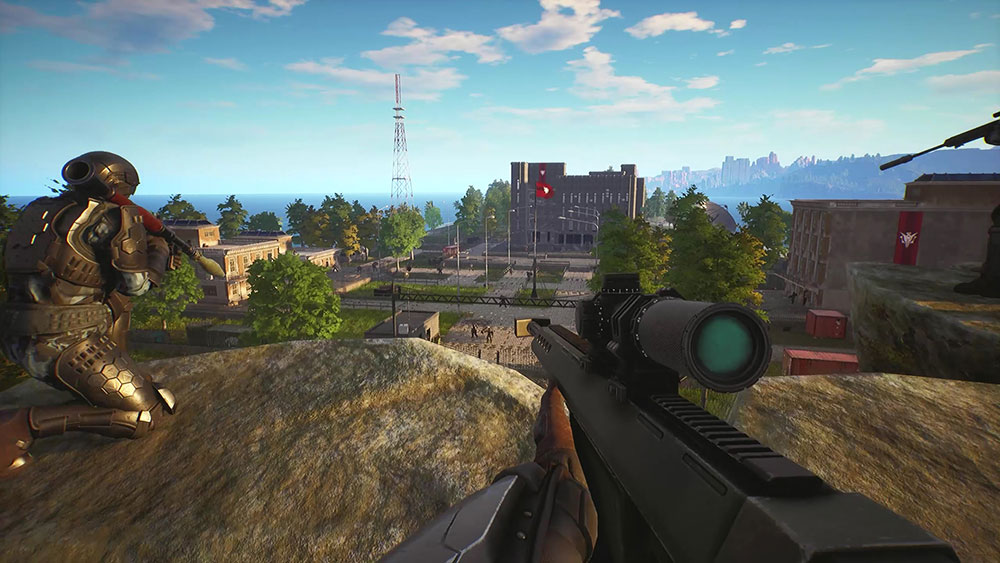
These are various defensive structures and traps available in the game “The Front,” unlocked from the Technology and Structures tabs of the Tech interface. Here’s a summary of each one:
- Wood Spike Barriers: These defensive structures damage creatures that collide with them.
- Flip Floor: It appears as a normal wood floor, but creatures that walk over it will fall through.
- SpringBoard: Creatures walking over this will be launched into the air.
- Beast Trap: Inflicts damage and immobilizes creatures that pass over it. Cannot be attacked directly.
- Barbed Wire: Inflicts damage on creatures that pass through it. Deals additional damage when electrified.
- Arrow Walls: Must be placed on normal walls and inflict damage on enemies passing within 6 meters. Must be equipped with stone arrows.
- Poison Ballista: Inflicts poison damage and slows creatures. Automatically fires arrows at players and NPCs.
- Blade Trap: Features spinning blades that damage enemies. Must be connected to an electrical system.
- Guillotine: Inflicts significant damage to enemies that pass through. Must be placed inside an Open Wall.
- Poison Arrow Trap: Inflicts poison damage and slows creatures. Must be placed on a wall, connected to an electrical system, and equipped with poison cream.
- Anti-Ground Gun: Modified to attack ground targets. Must be connected to an electrical system and equipped with Large AP Ammo.
- Automatic Turret: Automatically attacks enemies within range. Must be connected to an electrical system and equipped with Rifle Ammo.
- Flamethrower: Sprays ignited fuel at targets. Must be connected to an electrical system and equipped with Gasoline.
- Hammer Trap: A metallic hammer that deals damage to passing enemies. Its swing direction can be adjusted.
- Shotgun Trap: Inflicts massive damage to nearby enemies. Must be equipped with Lead Pellets. Its angle can be adjusted.
- Proximity Mine: Must be placed on a wall and connected to an electrical system. It detonates under pressure.
- Anti-Air Defense System: Automatically attacks flying targets. Must be equipped with Portable SAMs and be connected to an electrical system.
- Claymore Mine: Emits infrared rays and detonates when creatures pass by.
- Vehicle Mine: Explodes when a vehicle passes by.
- Cannon: An advanced automated defense system that fires shells to shred nearby enemies. Must be connected to an electrical system and equipped with Medium AP Ammo.
These structures and traps provide a variety of ways to defend your base and deal with different types of threats in the game.
In The Front, squads are an essential part of the gameplay, providing a cooperative and strategic advantage. Here’s how squads work in the game:
The Front Squad Basics
- A squad in The Front can have up to 6 players.
- Squad members can share supplies and collaborate on building structures, enhancing efficiency.
- Being part of a squad helps in defending against environmental threats and other players.
Ownership and Spacetime Beacon:
- The squad leader, designated by the Spacetime Beacon, has ownership of all squad structures within the beacon’s range.
- Non-squad members are unable to construct structures within the squad’s territory marked by the Spacetime Beacon.

Creating a Squad:
- Press the designated key (often “G”) to open the Squad interface.
- Click “Create Squad” and select a squad icon and name.
- Confirm to create your squad.
Joining a Squad:
- To apply to join a squad, open the “Join Squad” tab in the Squad interface.
- Choose a squad from the list and click “Apply.” Wait for approval by the squad.
- Alternatively, the squad leader can invite a player by clicking the “Invite” button in the Squad interface. Enter the player’s character name and wait for their agreement.
By forming and joining squads, players can enhance their collaborative experience in The Front, making it easier to tackle the game’s challenges.
The Front Tasks System
In The Front, tasks encompass a variety of survival and combat objectives. When players successfully complete these tasks, they earn XP (experience points). Additionally, certain tasks offer rewards in the form of Ether Shards, enhancing the gameplay experience.
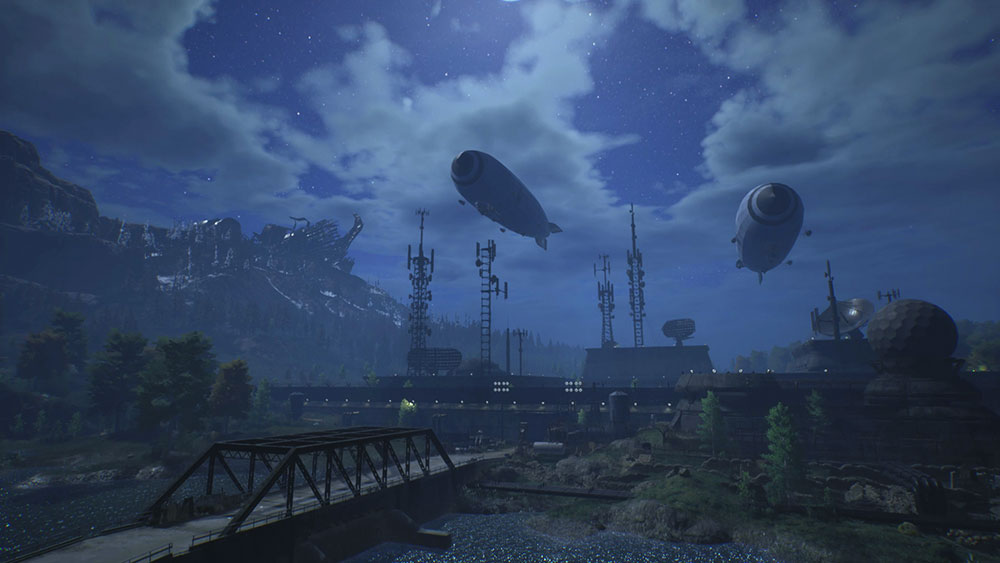
Here’s a breakdown of how tasks function in The Front:
| Task Variety: Tasks in the game span both survival and combat categories, providing players with a diverse range of challenges to tackle. Experience Points (XP): By successfully fulfilling these tasks, players accumulate XP. XP is vital for character progression and can be used to unlock new abilities and improve your character’s skills. Ether Shards: Some tasks also provide Ether Shards as rewards. Ether Shards have specific in-game utility and can be used for various purposes, enhancing the gameplay experience. |
Completing tasks in The Front not only contributes to character development but also offers valuable rewards, making them an integral part of the game’s progression system.
Death and Revival System
Your understanding of death and revival in The Front is accurate. Death is a common occurrence in the game, and players may encounter various situations that lead to their character’s demise. Proper preparation, such as having high-level weapons and equipment, maintaining strong defenses, and ensuring an ample supply of resources, can significantly reduce the risk of dying.
There are multiple factors that can result in character death in The Front, including hunger, thirst, falls, drowning, attacks from wildlife, NPCs, zombies, traps (in PVP scenarios), and player-versus-player (PVP) combat.
When a character dies, they will drop all of their items at the location of their death. These items will remain on the ground for 30 minutes before disappearing. During this window, players have the opportunity to retrieve their belongings.
| Revival is possible in The Front, and there are two primary methods for returning to life: Default Revival Location: If you haven’t placed a sleeping bag or bed, you will revive at a default revival area designated by the game. Reviving at a Sleeping Bag or Bed: Players have the option to place sleeping bags or beds within the game world. These can serve as personal revival points, allowing you to choose to revive at the location where you’ve placed them. |
Properly positioning sleeping bags and beds is crucial for both new and experienced players, ensuring a quicker and more strategic recovery upon death.
The Front Game Resources & Stuff
Resources are essential for constructing structures, crafting equipment and vehicles, and fortifying your defenses in the game. Here’s a summary of the resource acquisition methods and important details:

| Collection Methods: Resources can be collected in three ways: by hand, with tools, and with vehicles. The game also offers structures like mines and oil wells that automatically produce resources. These structures must be connected to an electrical system to function. Resource Collection Categories: Basic resources can be collected using the methods mentioned above. Additional Resource Acquisition Methods: While exploring the wilderness, you may encounter Waste Barrels and Trash Baskets that can be looted for small amounts of supplies. Points of Interest (POIs) scattered across the map, such as gas stations, military bases, abandoned factories, and more, offer opportunities to gather various supplies. These locations are often guarded by NPCs and can yield advanced items. Supplies Sent From the Future: Randomly appearing supplies on the map, especially visible at night, come in five qualities: uncommon, rare, epic, legendary, and exotic, restricted by player level. They contain high-value materials, including a chance to obtain high-quality items and blueprints. Player Interactions: Players can exchange supplies with others by using the “Discard” function to drop items on the ground. On PVP servers, you can obtain supplies by killing other players and raiding their bases. The supplies in their inventory will drop upon death. Special NPCs and Mines: Points of Interest and mines scattered around the map are guarded by armed NPCs. Defeating these NPCs can yield valuable items, and certain special NPCs drop better items. Spacetime Beacon Supplies: Placing a Spacetime Beacon allows you to periodically receive supplies. However, these supplies trigger NPC attacks on your beacon. To receive Spacetime Beacon supplies, interact with the beacon’s terminal, select the number of rounds, and defend the beacon from NPC attacks. The quality of the supplies improves with each round of successful defense. |

The Front Ether Shards – How to Get
Ether Shards play a vital role in unlocking new technology in the Tech interface. Here’s a summary of the key points:
| Importance of Ether Shards: Ether Shards are essential for unlocking new technology in the Tech interface. While some basic tech can be unlocked without Ether Shards, most advanced tech requires them. The higher your tech level, the more Ether Shards you will need, indicating their increasing importance as you progress. Ways to Obtain Ether Shards: Completing Missions: Ether Shards can be earned by completing in-game missions. Exploring the Wilderness: You can find Ether Shards while exploring the game’s wilderness. Looting Points of Interest: Points of Interest (POIs) are locations scattered across the map. You can loot them to obtain Ether Shards. Obtaining Supplies from the Future: Supplies sent from the future can include Ether Shards, and they often appear on the map. NPC Drops: Killing non-playable characters (NPCs) can result in them dropping Ether Shards. Raid Monsters: Some special monsters encountered during raids may yield Ether Shards when defeated. Spacetime Beacon Supply Drops: Placing a Spacetime Beacon allows you to periodically receive supplies, which can include Ether Shards. Defending your beacon during the raid is crucial. Exchanging with Other Players: Players can trade or exchange Ether Shards with each other. Killing Other Players: On player-versus-player (PVP) servers, defeating other players and raiding their bases can result in acquiring their Ether Shards. This information provides a clear understanding of the significance of Ether Shards and the various methods to obtain them in The Front. |




Good content
Good one
What ?
Front wiki
finallyyyy, Thnx a tonnn buddd
You’re Welcome